
Top Lighting Gear for Indie Filmmakers: Budget-Friendly Guide
Identify essential lighting gear for cinematic visuals on a budget. Compare features, price ranges, and technical tips to elevate your indie film's look.
FILM GEAR GUIDE
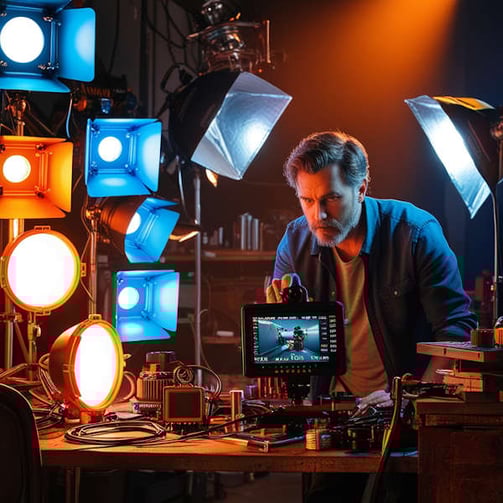
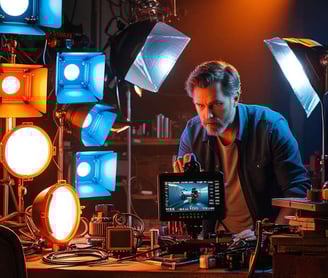
Lighting is the unsung hero of film production, capable of transforming an ordinary scene into a cinematic masterpiece. It sets the mood, creates depth, and guides the viewer's eye through the frame. For short and indie filmmakers, mastering the art of lighting is crucial to elevating their projects and competing with bigger-budget productions.
However, these filmmakers often face significant challenges when it comes to lighting their scenes. Budget constraints can make it seem impossible to achieve the desired look without breaking the bank. Limited resources, tight schedules, and small crews further complicate the process of creating professional-quality lighting setups.
This article aims to be your guiding light through the complex world of film lighting gear. We'll explore how to select cost-effective, high-quality equipment that can help you achieve stunning results without emptying your wallet. Whether you're shooting your first short film or working on your next indie feature, we'll provide you with the knowledge and tools to make informed decisions about your lighting setup.
By the end of this guide, you'll understand how to:
Identify essential lighting gear for different production needs
Balance quality and affordability when choosing equipment
Maximize the potential of budget-friendly lighting solutions
Create professional-looking lighting setups with limited resources
II. Understanding the Basics of Film Lighting
Before diving into specific gear recommendations, it's crucial to grasp the fundamental concepts of film lighting. This knowledge will help you make informed decisions when selecting and using your equipment.
Key Lighting Terms and Concepts
Key Light
The key light is the primary and usually brightest light source in a scene. It's typically positioned at a 45-degree angle to the subject and provides the main illumination and shadows.
Fill Light
The fill light is a softer, less intense light used to reduce shadows created by the key light. It's often placed opposite the key light to balance the overall lighting.
Backlight
Also known as a rim light, the backlight is positioned behind the subject to create separation from the background and add depth to the shot.
Color Temperature
Measured in Kelvin (K), color temperature refers to the warmth or coolness of light. Lower temperatures (2000-3000K) produce warm, orange tones, while higher temperatures (5000K+) create cooler, blue tones.
The Role of Lighting in Storytelling and Mood Setting
Lighting is a powerful tool for visual storytelling. It can:
Establish time of day and location
Create atmosphere and evoke emotions
Guide the viewer's attention to important elements in the frame
Enhance the character's appearance or state of mind
Support the overall tone and genre of your film
For example, harsh, high-contrast lighting might be used in a noir-style detective film, while soft, warm lighting could enhance the mood of a romantic comedy.
Common Lighting Setups Used in Filmmaking
Three-Point Lighting
This classic setup uses a key light, fill light, and backlight to create a well-balanced, professional look. It's versatile and can be adapted for various scenes and subjects.
High-Key Lighting
Characterized by bright, even illumination with minimal shadows, high-key lighting is often used in comedies, commercials, and upbeat scenes.
Low-Key Lighting
This dramatic style emphasizes shadows and contrast, typically using a strong key light and minimal fill. It's popular in thrillers, horror films, and moody scenes.
Natural Lighting
Utilizing available light from windows or outdoor sources can create a realistic look and save on equipment costs. However, it requires careful planning and potentially the use of reflectors or diffusers.
Practical Lighting
This involves using visible light sources within the scene, such as lamps, candles, or computer screens. It can add realism and depth to your shots while supplementing your main lighting setup.
Understanding these basics will help you approach your lighting decisions with confidence, regardless of your budget constraints.
III. Assessing Your Lighting Needs
Before investing in lighting gear, it's essential to evaluate your specific requirements. This assessment will help you make smart, budget-conscious decisions that align with your project's needs.
Determining Your Project's Specific Lighting Requirements
Genre and Tone
Different genres often have distinct lighting styles:
Horror: Low-key lighting with harsh shadows
Romantic comedy: Soft, flattering lighting
Documentary: Natural-looking, adaptable lighting
Sci-fi: Stylized, often colorful lighting
Consider the overall tone of your project and how lighting can enhance it.
Location Considerations
Your shooting locations will significantly impact your lighting needs:
Interiors: May require more powerful lights to illuminate larger spaces
Exteriors: Might need lighting gear for fill or to combat harsh sunlight
Day vs. Night: Different lighting setups for various times of day
Power availability: Some locations may have limited electrical outlets
The Relationship Between Camera Choice and Lighting Needs
Your camera's capabilities play a crucial role in determining your lighting requirements:
Sensor Size and Sensitivity
Cameras with larger sensors or higher ISO performance generally require less light. This can be advantageous for low-budget productions, as you may need fewer or less powerful lights.
Dynamic Range
Cameras with higher dynamic range can capture more detail in shadows and highlights, potentially reducing the need for complex lighting setups.
Color Science
Understanding your camera's color reproduction can help you choose appropriate lights and gels to achieve your desired look.
How to Conduct a Lighting Recce and Plan Accordingly
A lighting recce (reconnaissance) is a pre-production visit to your shooting locations to assess lighting conditions and plan your setups. Here's how to conduct an effective recce:
Visit at the same time of day you plan to shoot
Observe natural light patterns and potential challenges
Note power source locations and any electrical limitations
Identify potential placement spots for lights and other equipment
Take photos or videos for reference
Consider potential sound issues related to lighting placement
Planning Based on Your Recce
After your recce, create a lighting plan that includes:
A list of required lighting fixtures and accessories
A rough lighting diagram for each setup
Notes on any special requirements (e.g., gels, diffusion, stands)
A schedule for setting up and breaking down lighting equipment
By thoroughly assessing your lighting needs, you can avoid overspending on unnecessary gear while ensuring you have the essential tools to bring your vision to life.
IV. Types of Lighting Gear for Indie Filmmaking
Understanding the various types of lighting gear available is crucial for making informed decisions within your budget. Let's explore the most common types of lights used in indie filmmaking, their pros and cons, and some budget-friendly options.
Overview of Different Types of Lights
LED Lights
Light Emitting Diode (LED) lights have become increasingly popular in recent years.
Pros:
Energy-efficient
Low heat emission
Often dimmable and color-adjustable
Long lifespan
Portable and lightweight
Cons:
Higher initial cost (though prices are decreasing)
Some cheaper models may have color accuracy issues
Budget-friendly option: Neewer 660 LED Video Light
Tungsten Lights
These traditional incandescent lights have been a staple in film production for decades.
Pros:
Excellent color rendering
Dimmable
Relatively inexpensive
Cons:
Generate significant heat
Not energy-efficient
Require color correction gels for daylight balancing
Budget-friendly option: IKAN iLED312-v2 On-Camera Dual Color LED Light
Fluorescent Lights
Fluorescent lights offer a soft, diffused light source.
Pros:
Energy-efficient
Low heat emission
Produce soft light
Relatively affordable
Cons:
Limited control over beam spread
Some models may flicker on camera
Color accuracy can vary
Budget-friendly option: Kino Flo Diva-Lite LED 20 DMX Kit
HMI Lights
Hydrargyrum Medium-arc Iodide (HMI) lights are powerful, daylight-balanced lights often used for outdoor shoots.
Pros:
Very bright output
Daylight-balanced
Energy-efficient compared to tungsten for the same output
Cons:
Expensive
Require a ballast
Not easily dimmable
Budget-friendly alternative: Powerful LED panels like the Aputure 300d II
Pros and Cons in the Context of Indie Filmmaking
For indie filmmakers working with limited budgets, certain factors become particularly important:
Versatility: Lights that can serve multiple purposes offer better value.
Portability: Easy-to-transport gear is crucial for small crews and multiple locations.
Power efficiency: Lights that don't require much power are preferable for location shoots with limited electrical access.
Durability: Robust equipment that can withstand frequent use and transport is a wise investment.
Learning curve: User-friendly lights allow for quicker setup and more efficient shoots.
Spotlight on Budget-Friendly and Versatile Lighting Options
1. LED Panel Kits
Example: Neewer 2-Pack Dimmable Bi-Color 480 LED Video Light and Stand Lighting Kit
Why it's great for indie filmmakers:
Adjustable color temperature
Dimmable
Comes with stands and carrying case
Versatile for various shooting scenarios
2. LED Fresnel Lights
Example: Godox S30 Focusing LED Light
Why it's great for indie filmmakers:
Focusable beam
Compact and portable
Relatively affordable
Can mimic traditional Fresnel lights at a fraction of the cost
3. Ring Lights
Example: Neewer 18-inch RGB Ring Light
Why it's great for indie filmmakers:
Perfect for beauty shots and interviews
Offers various color options
Compact and easy to set up
Can double as a practical light in scenes
4. Flexible LED Panels
Example: Falconeyes RX-18TD 150W Flexible LED Panel
Why it's great for indie filmmakers:
Can be molded to fit various spaces
Easy to hide in tight spots
Produces soft, flattering light
Highly portable
5. Practical Lights
Example: Philips Hue White and Color Ambiance Smart Bulb Starter Kit
Why it's great for indie filmmakers:
Can be used as both practical and primary light sources
Offers full RGB color control via smartphone app
Creates realistic, motivated lighting
Versatile for various scene setups
By carefully considering these options and how they align with your project's needs, you can build a versatile lighting kit that serves your creative vision without overstretching your budget.
V. Essential Lighting Gear for Low-Budget Filmmaking
While the main lights are crucial, a well-rounded lighting kit includes various accessories that can significantly enhance your lighting capabilities. Let's explore some essential gear for low-budget filmmaking, along with tips for maximizing their use and some creative DIY alternatives.
Must-Have Lighting Equipment
1. Softboxes
Softboxes diffuse and shape light, creating a softer, more flattering illumination.
Tips for use:
Use close to the subject for a softer effect
Experiment with different sizes for varied results
Can double as a key or fill light
Budget option: Neewer 24x24 inch Softbox
2. Reflectors
Reflectors bounce light onto your subject, filling in shadows or adding highlights.
Tips for use:
Use the silver side for a cooler, more intense reflection
Gold side adds warmth, ideal for sunset simulations
White side provides subtle fill
Budget option: Selens 5-in-1 Reflector Kit
3. Diffusers
Diffusers soften harsh light sources, reducing contrast and shadows.
Tips for use:
Place close to the light for maximum softening effect
Can be used with natural light to soften sunlight
Experiment with different materials for varied effects
Budget option: Neewer 5-in-1 Collapsible Diffuser
4. Flags and Nets
These tools block or reduce light in specific areas of your shot.
Tips for use:
Use flags to create negative fill or shape light
Nets can subtly reduce light intensity without changing its quality
Budget option: Matthews 24x36" Flag Kit
5. Gels
Color gels alter the color of your light, allowing for creative effects or color correction.
Tips for use:
Use CTB (Color Temperature Blue) to make tungsten lights match daylight
Experiment with bold colors for stylistic choices
Layer gels for custom colors
Budget option: Neewer Complete CTO/CTB Color Correction Gel Filter Set
Optimizing a Limited Lighting Kit for Maximum Effect
Master the art of bouncing light: Use walls, ceilings, or reflectors to create soft, natural-looking light.
Embrace practical lights: Incorporate existing light sources like lamps or windows into your lighting design.
Use distance to your advantage: Remember that moving a light closer increases its intensity and softens its quality.
Layer your lights: Even with limited fixtures, you can create depth by using your lights at different intensities and distances.
Utilize negative fill: Sometimes, strategically removing light can be as effective as adding it.
Maximize versatility: Choose lights and modifiers that can serve multiple purposes.
Plan your shots carefully: Group similar setups together to minimize time spent re-lighting.
DIY Lighting Solutions and Creative Alternatives
Homemade Softbox: Use a cardboard box lined with aluminum foil and covered with white fabric.
DIY China Ball: A paper lantern with a bulb inside can create beautiful, soft omnidirectional light.
Shower Curtain Diffuser: A white shower curtain can serve as a large, cheap diffuser.
Homemade Flag Kit: Create flags using black foam board and light stands or C-stands.
DIY Reflector: Mount a piece of foam board or a emergency blanket on a stand for an effective reflector.
Practical Light Hacks: Use dimmers on household lamps to control intensity, or colored cellophane for gels.
Clamp Light Kit: Hardware store clamp lights with daylight balanced bulbs can be surprisingly versatile.
Bounce Cards: White foam core boards can be used to bounce and shape light effectively.
DIY Light Wand: Create a light wand using LED strips in a clear tube for unique lighting effects.
Repurposed Household Items: Baking paper as diffusion, aluminum foil as reflectors, or black garbage bags as flags.
Remember, while these DIY solutions can be effective, always prioritize safety. Ensure any homemade equipment is secure and doesn't pose fire or electrical hazards.
By combining these essential tools, optimization techniques, and creative DIY solutions, you can significantly expand your lighting capabilities without breaking the bank.
VI. Buying vs. Renting Lighting Equipment
One of the most crucial decisions for indie filmmakers is whether to buy or rent lighting equipment. This choice can significantly impact your budget and workflow. Let's explore the pros and cons of each option and provide guidance for different scenarios.
Comparison of Costs and Benefits
Buying Equipment
Pros:
Always available for use
Cost-effective for frequent shoots
Opportunity to become intimately familiar with your gear
Potential tax write-off for professional filmmakers
Cons:
High upfront costs
Responsibility for maintenance and repairs
Risk of gear becoming outdated
Storage space requirements
Renting Equipment
Pros:
Access to high-end gear that might be too expensive to purchase
No long-term commitment or storage concerns
Equipment is typically well-maintained and up-to-date
Ability to tailor your kit to each project's specific needs
Cons:
Costs can add up for frequent or long-term projects
Availability may be limited, especially during peak seasons
Less opportunity to develop deep familiarity with the equipment
Potential for last-minute logistical challenges
Recommendations for Different Scenarios
For Beginners or Occasional Filmmakers
Recommendation: Start with a basic kit of owned equipment, and rent specialized gear as needed.
Rationale: This approach allows you to build familiarity with essential tools while maintaining flexibility for varied projects.
For Regular Short Film or Commercial Producers
Recommendation: Invest in a versatile lighting package that covers 80% of your needs, and rent additional gear for specific requirements.
Rationale: This balance provides consistency in your workflow while allowing for project-specific adaptations.
For Full-Time Indie Filmmakers
Recommendation: Gradually build a comprehensive lighting kit, but maintain relationships with rental houses for specialized or backup equipment.
Rationale: Owning a full kit reduces ongoing costs and enhances familiarity, while the option to rent maintains flexibility for unique projects.
Making Your Decision
To decide between buying and renting, consider the following factors:
Frequency of use: How often will you use the equipment?
Project diversity: Do your lighting needs vary significantly between projects?
Budget: What's your upfront budget vs. your per-project budget?
Storage: Do you have space to store owned equipment?
Maintenance capabilities: Are you prepared to maintain and repair owned gear?
Technological changes: How quickly does the equipment you need evolve?
Remember, your approach can evolve over time. Many successful filmmakers start by renting or buying minimal gear and gradually expand their kit as their needs and resources grow.
VII. Harnessing Natural Light
Natural light can be a powerful tool for indie filmmakers, offering beautiful, authentic illumination without the need for expensive lighting setups. However, it requires skill and planning to use effectively. Let's explore how to make the most of natural light in your productions.
Techniques for Effectively Using Natural Light in Filmmaking
1. Time of Day Planning
Golden Hour: Shoot during the first and last hour of sunlight for warm, soft lighting.
Avoid Midday Sun: Harsh overhead light creates unflattering shadows. If you must shoot at midday, seek shade or use diffusion.
2. Weather Considerations
Overcast Days: Clouds act as a natural softbox, providing even, flattering light.
Sunny Days: Use buildings or trees to create shade and control contrast.
3. Window Light
Position subjects near windows for soft, directional light.
Use sheer curtains as natural diffusion.
4. Reflectors and Negative Fill
Bounce sunlight to fill shadows using reflectors.
Use black flags or cards to add contrast and shape light.
5. Location Scouting
Consider the sun's path when choosing locations.
Look for natural features that can act as light modifiers (e.g., white walls for bounce, trees for dappled light).
Combining Artificial and Natural Light Sources
1. Balancing Color Temperature
Use gels on artificial lights to match the color of natural light.
Adjust your camera's white balance to find a happy medium between sources.
2. Augmenting Natural Light
Use artificial lights to extend the "golden hour" look.
Add a subtle key light to enhance a subject's features in flat natural light.
3. Creating Depth
Use artificial backlights or edge lights to separate subjects from backgrounds in naturally lit scenes.
4. Dealing with Changing Conditions
Have artificial lights ready to maintain continuity if natural light shifts during a shoot.
5. Practical Lights
Incorporate practical sources (lamps, candles) to blend seamlessly with natural light and add depth to your scene.
Practical Tips for Indie Filmmakers
Invest in a good reflector kit - it's an affordable way to control natural light.
Learn to read natural light - practice observing how light changes throughout the day.
Be flexible with your shooting schedule - be prepared to wait for the right light or quickly adapt to changing conditions.
Use apps like Sun Seeker to track the sun's position and plan your shots accordingly.
Don't be afraid to mix light sources - natural light doesn't mean you can't use any artificial light at all.
By mastering the use of natural light, you can create stunning visuals without breaking the bank. Remember, some of cinema's most memorable images were captured using nothing more than the sun and a thoughtful approach to framing and exposure.
VIII. Enhancing Your Lighting with Accessories
Lighting accessories are the unsung heroes of film lighting. They allow you to shape, control, and modify your light sources, dramatically expanding your creative possibilities without necessarily increasing your budget. Let's explore some essential lighting accessories and how to use them effectively.
Overview of Lighting Accessories
1. Gels
Gels are thin, colored sheets placed in front of lights to change their color.
Types:
Color Correction (CTB, CTO)
Color Effects (Various colors)
Diffusion (Softens light)
2. Barn Doors
Adjustable flaps attached to the front of lights to control light spill.
3. Grids
Honeycomb-shaped attachments that narrow the beam of light, creating a more focused effect.
4. Scrims
Metal mesh screens that reduce light intensity without changing its quality.
5. Flags
Solid panels used to block light and create shadows.
6. Diffusion Frames
Frames that hold diffusion material to soften light.
7. Reflectors
Surfaces used to bounce light onto a subject.
8. Softboxes
Enclosures that diffuse and soften light output.
How to Use Accessories to Shape and Modify Light
1. Gels
Use CTB (Color Temperature Blue) to cool down tungsten lights for daylight scenes.
Apply CTO (Color Temperature Orange) to LED lights for a warmer, tungsten-like effect.
Experiment with colored gels for creative effects or to simulate practical light sources (e.g., TV screens, neon signs).
2. Barn Doors
Shape light to illuminate specific areas of your scene.
Create a slash of light across a wall for dramatic effect.
Control spill to prevent light from hitting unwanted areas or causing lens flare.
3. Grids
Focus light on a specific area or object.
Create a spotlight effect for dramatic scenes.
Use on background lights to create separated pools of light.
4. Scrims
Subtly reduce light intensity without changing its quality.
Layer scrims for finer control over light reduction.
5. Flags
Create negative fill to add contrast to a subject's face.
Shape light by cutting it off from certain areas of the frame.
Use multiple flags to create complex light patterns.
6. Diffusion Frames
Soften hard light sources for a more flattering effect on faces.
Create the illusion of larger light sources.
Layer different diffusion materials for custom effects.
7. Reflectors
Bounce key light to fill in shadows.
Use as a subtle key light by reflecting sunlight or artificial light.
Choose silver for a cooler, more intense reflection, or gold for a warmer tone.
8. Softboxes
Create soft, wrap-around light for interviews or beauty shots.
Use as a key light for a flattering, natural look.
Experiment with different sizes - larger softboxes create softer light.
Budget-Friendly Accessory Options
DIY Barn Doors: Create using black foam core or cardboard.
Homemade Flags: Use black poster board or foam core mounted on light stands.
Budget Gels: Purchase sample packs or use colored cellophane for non-critical applications.
Affordable Reflectors: Use foam core boards or emergency blankets as reflectors.
DIY Diffusion: Employ white shower curtains or bed sheets as large diffusers.
Clip-on Grids: Make your own using black straws or corrugated plastic.
Makeshift Scrims: Use window screen material stretched over a frame.
Budget Softbox: Create using a white pillowcase or translucent fabric box.
Tips for Using Accessories Effectively
Start with the basics: A few flags, diffusion frames, and reflectors can go a long way.
Experiment: Try different combinations of accessories to achieve unique lighting effects.
Be mindful of color: When using gels, remember that mixed light temperatures can be challenging to balance in post-production.
Safety first: Ensure all accessories are securely attached to lights and stands.
Plan ahead: Consider which accessories you'll need during pre-production to avoid last-minute scrambling.
Learn to layer: Combining multiple accessories (e.g., gel + diffusion + grid) can create complex, nuanced lighting.
Keep it organized: Develop a system for storing and transporting your accessories to save time on set.
By mastering the use of these accessories, you can significantly expand your lighting capabilities without breaking the bank. Remember, creativity and ingenuity often matter more than expensive gear.
IX. Practical Tips and Tricks for Indie Filmmakers
As an indie filmmaker, you often need to be resourceful and creative when it comes to lighting. This section will provide you with practical advice, innovative techniques, and solutions to common challenges you might face on set.
Real-World Advice on Working with Limited Lighting Resources
1. Embrace Minimalism
Sometimes, a single, well-placed light can be more effective than a complex setup.
Learn to see and enhance the existing light in a location.
2. Prioritize Your Shots
Allocate more time and resources to lighting key scenes or close-ups.
Consider using a simpler lighting setup for wide shots or b-roll.
3. Leverage Practicals
Incorporate practical light sources (lamps, candles, phone screens) into your scene.
Use practicals to motivate your lighting choices and add depth to your frame.
4. Master the Art of Bouncing
Use white walls, ceilings, or bounce cards to create soft, natural-looking light.
Experiment with different surfaces for varied effects (e.g., silver for more contrast, gold for warmth).
5. Adapt Household Items
Chinese paper lanterns can create beautiful, soft omnidirectional light.
Clip lights from hardware stores can be versatile tools when used creatively.
6. Collaborate with Your Team
Involve your camera operator in lighting decisions to ensure optimal exposure and composition.
Work closely with your production designer to incorporate lighting-friendly elements into the set.
Creative Lighting Techniques for Impactful Storytelling
1. Motivated Lighting
Use visible or implied light sources within the scene to justify your lighting choices.
This approach can enhance realism and draw the audience into the story.
2. Contrasting Color Temperatures
Mix warm and cool light sources to create visual interest and depth.
Use this technique to separate foreground from background or to highlight story elements.
3. Dynamic Lighting
Incorporate subtle lighting changes to reflect the passage of time or shifts in mood.
Consider using dimmers or programmable LED lights for precise control.
4. Silhouettes and Shadows
Use backlighting to create dramatic silhouettes.
Experiment with hard light sources to cast interesting shadows that add texture to your frame.
5. Practical Light Animation
Animate practical sources like flickering fires, passing car headlights, or pulsing neon signs.
This can add life to static shots and enhance the atmosphere.
6. Light as a Character
Use lighting to reveal or obscure elements of your story strategically.
Consider how changes in lighting can reflect character arcs or plot developments.
Avoiding Common Lighting Pitfalls in Indie Filmmaking
1. Overlooking Color Temperature
Be aware of mixed light sources and use gels to correct or creatively exploit color differences.
Remember that camera sensors may perceive colors differently than the human eye.
2. Ignoring the Background
Ensure your background isn't overly bright or distracting from your subjects.
Use flags or negative fill to add depth and separation.
3. Flat Lighting
Avoid lighting everything evenly, which can result in a boring, two-dimensional look.
Create contrast and shadows to add depth and interest to your images.
4. Inconsistent Lighting Continuity
Maintain consistent lighting direction and quality when cutting between shots in a scene.
Take detailed lighting notes and reference photos to ensure continuity across shooting days.
5. Neglecting Eye Lights
Remember to add a catch light in your subjects' eyes, especially for close-ups.
A small LED or well-placed reflector can make a significant difference.
6. Underestimating Setup Time
Always allocate more time than you think you'll need for lighting setup.
Consider pre-rigging lights when possible to save time during the actual shoot.
7. Forgetting Safety
Always secure your lighting equipment properly, especially when working with top-heavy or high setups.
Be mindful of heat from lights, particularly when using fabric or paper modifiers.
Final Thoughts
Remember, limitations can often spark creativity. Some of the most memorable film scenes were born out of the need to work around budget or equipment constraints. Trust your eye, be open to experimentation, and don't be afraid to break the "rules" if it serves your story.
As you gain experience, you'll develop your own techniques and shortcuts. The key is to keep learning, stay adaptable, and always prioritize the story you're trying to tell. Lighting is a powerful tool in your filmmaking arsenal – use it wisely, and it will elevate your productions regardless of your budget constraints.
X. Conclusion
As we wrap up our exploration of lighting gear for short and indie filmmakers on a budget, let's recap the key points and offer some final thoughts to inspire your future projects.
Recap of Key Takeaways for Choosing Lighting Gear on a Budget
Assess Your Needs: Understand your project requirements before investing in equipment.
Versatility is Key: Prioritize gear that can serve multiple purposes to maximize your budget.
LED Advantages: Consider LED lights for their energy efficiency, versatility, and low heat output.
Essential Accessories: Don't underestimate the power of modifiers like diffusers, reflectors, and flags.
Natural Light: Learn to harness and shape available light to complement your artificial sources.
Rent vs. Buy: Weigh the pros and cons of renting and buying based on your specific situation and long-term goals.
DIY Solutions: Embrace creative, budget-friendly alternatives to expensive gear when appropriate.
Quality over Quantity: A few well-chosen, quality pieces often outperform a large array of subpar equipment.
Encouragement to Experiment and Find Unique Lighting Solutions
Lighting is as much an art as it is a technical skill. While this guide provides a solid foundation, the real learning comes from hands-on experience and experimentation. We encourage you to:
Practice Regularly: Set up lighting challenges for yourself, even when you're not on an active project.
Analyze Films You Admire: Study the lighting in your favorite movies and try to recreate those looks.
Embrace Constraints: Use limitations as a catalyst for creativity. Some of the most innovative techniques arise from working with minimal resources.
Collaborate and Learn: Connect with other filmmakers, share techniques, and learn from each other's experiences.
Stay Curious: The world of film lighting is constantly evolving. Stay open to new technologies and techniques.
Final Thoughts on the Role of Lighting in Enhancing Film Quality
Lighting is a fundamental element of visual storytelling. It has the power to:
Set the mood and atmosphere of your film
Guide the viewer's eye and attention
Enhance the emotional impact of a scene
Bring depth and dimension to your images
Support and elevate your narrative
Remember, a well-lit scene shot on a smartphone can often be more visually compelling than a poorly lit scene shot on the most expensive camera. Your creativity, understanding of light, and ability to problem-solve are far more valuable than any piece of equipment.
As you continue your filmmaking journey, keep in mind that every lighting challenge is an opportunity to grow and innovate. Don't be discouraged by budget constraints – some of the most memorable films in history were made with limited resources and a lot of ingenuity.
Ultimately, the goal of good lighting is not to draw attention to itself, but to serve the story you're telling. As you develop your skills, you'll find that lighting becomes an intuitive part of your filmmaking process, allowing you to bring your creative vision to life more effectively than ever before.
Remember, every master was once a beginner. Keep experimenting, learning, and creating.
FAQ
Q1: What is the most cost-effective type of lighting for indie filmmaking?
A: LED lights often provide the best balance of price, quality, and versatility for indie filmmakers. They're energy-efficient, produce little heat, and many models offer adjustable color temperature and brightness. However, the most cost-effective option can vary based on your specific needs. For very tight budgets, a combination of clamp lights with daylight-balanced bulbs and some DIY modifiers can be a good starting point.
Q2: Can I use natural light for my entire film project?
A: While it's possible to use natural light for an entire project, it comes with challenges. Natural light can be unpredictable and changes quickly, which can affect continuity. It's often best to supplement natural light with artificial sources for more control. However, some filmmakers have successfully used only natural light, such as in "The Revenant." It requires careful planning, flexibility in scheduling, and a good understanding of how to shape and control available light.
Q3: How do I determine the right amount of lighting equipment for my project?
A: Consider the following factors:
Project scale (number of locations, indoor vs. outdoor scenes)
Crew size and experience
Available power sources
Desired aesthetic
Budget
Start with a basic 3-point lighting kit and add specialized equipment as needed. It's often better to have a few versatile lights you know well than a large array of equipment you're unfamiliar with.
Q4: What are some common lighting mistakes beginners make and how can I avoid them?
Common mistakes include:
Flat lighting: Avoid by creating contrast and using shadows creatively.
Inconsistent color temperature: Use gels to balance mixed light sources.
Overlooking the background: Pay attention to what's behind your subject.
Improper exposure: Learn to read histograms and use light meters.
Ignoring motivated lighting: Consider where light would naturally come from in the scene.
Avoid these by studying lighting principles, practicing regularly, and always considering how light interacts with your entire frame.
Q5: Are there any DIY lighting solutions that can work for professional-looking films?
Yes, several DIY solutions can yield professional results:
Chinese paper lanterns for soft, omnidirectional light
Shower curtain diffusers
Reflectors made from foam core or emergency blankets
DIY light wands using LED strips
Homemade flags and gobos using black foam core
Remember, the key is not just the equipment, but how you use it creatively to serve your story.
Q6: How important are lighting accessories, and which ones should I prioritize on a tight budget?
Accessories are crucial for shaping and controlling light. On a tight budget, prioritize:
A 5-in-1 reflector kit
Diffusion material (like shower curtains or rip-stop nylon)
A set of spring clamps
Gels (especially CTB and CTO for color correction)
A few flags (can be DIY with black foam core)
These versatile items will allow you to modify your light sources in numerous ways.
Q7: Is it better to buy or rent lighting equipment for a short film?
This depends on your long-term plans:
• Buying: Better if you shoot frequently and have storage space. It allows you to become very familiar with your gear.
• Renting: Ideal for occasional shooters or those needing specialized equipment. It also lets you access higher-end gear than you might be able to afford to purchase.
For many indie filmmakers, a hybrid approach works best: own a basic kit and rent additional or specialized equipment as needed.
Q8: How can I effectively mix artificial and natural light?
To blend artificial and natural light:
Match color temperatures using gels on your artificial lights.
Use artificial lights to augment natural light patterns.
Employ diffusion on artificial lights to mimic soft natural light.
Use reflectors to bounce and shape both natural and artificial light.
Consider the motivation of light sources within your scene.
Practice and experimentation are key to mastering this skill.
Q9: What are some key lighting terms I should know as a beginner?
Essential terms include:
Key Light: The main light source
Fill Light: Reduces shadows cast by the key light
Backlight: Separates the subject from the background
Color Temperature: Measured in Kelvin, describes the warmth or coolness of light
Diffusion: Softens and spreads light
Barn Doors: Adjustable flaps to control light spread
Flag: Blocks light to create shadows or prevent spill
Scrim: Reduces light intensity without changing its quality
Q10: How do I handle lighting for different genres, like horror or romance?
Different genres often have distinct lighting styles:
Horror: Low-key lighting, harsh shadows, creative use of practicals
Romance: Soft, flattering light, warm color temperatures
Sci-Fi: Stylized color palettes, creative use of practicals and special effects lighting
Documentary: Natural-looking lighting that doesn't draw attention to itself
Study films in your chosen genre and experiment with recreating their lighting styles.
Q11: What are some tips for conducting an effective lighting recce?
For an effective lighting recce:
Visit at the same time of day you plan to shoot
Take photos and videos for reference
Note power source locations and any electrical limitations
Identify potential challenges (e.g., windows, reflective surfaces)
Consider how the sun's position will change throughout your shoot
Bring a light meter to measure existing light levels
Think about where you can place lights and how you'll hide them if necessary
Q12: How do I create a dramatic look with limited lighting gear?
To create drama with limited gear:
Embrace high contrast - use a single strong light source
Utilize shadows creatively
Experiment with unusual angles for your lights
Use colored gels to create mood
Incorporate practical lights into your composition
Use negative fill to enhance contrast
Explore silhouettes and backlighting
Remember, limitations often breed creativity.
Q13: Are there any mobile apps or tools that can help with lighting planning?
Useful apps include:
Sun Seeker: Tracks sun position and path
Artemis Pro: Digital director's viewfinder with augmented reality features
Pocket Light Meter: Uses your phone's camera as a light meter
Shot Designer: For creating lighting diagrams
Magic Hour: Calculates golden and blue hour times
These can help with planning, but nothing replaces on-site assessment and experience.
Q14: How do I maintain and store my lighting equipment to ensure longevity?
To maintain your gear:
Clean lenses and reflectors regularly with appropriate cloths
Allow lights to cool before packing them away
Coil cables properly to prevent damage
Store in a cool, dry place to prevent moisture damage
Use proper cases or bags for protection during transport
Regularly inspect for any damage or wear
Keep an inventory and label your equipment
Follow manufacturer's guidelines for bulb replacement and other maintenance
Proper care will extend the life of your equipment and ensure it's ready when you need it.


By: SF Block
Writing about indie filmmaking.